Follow Me On Social Media!

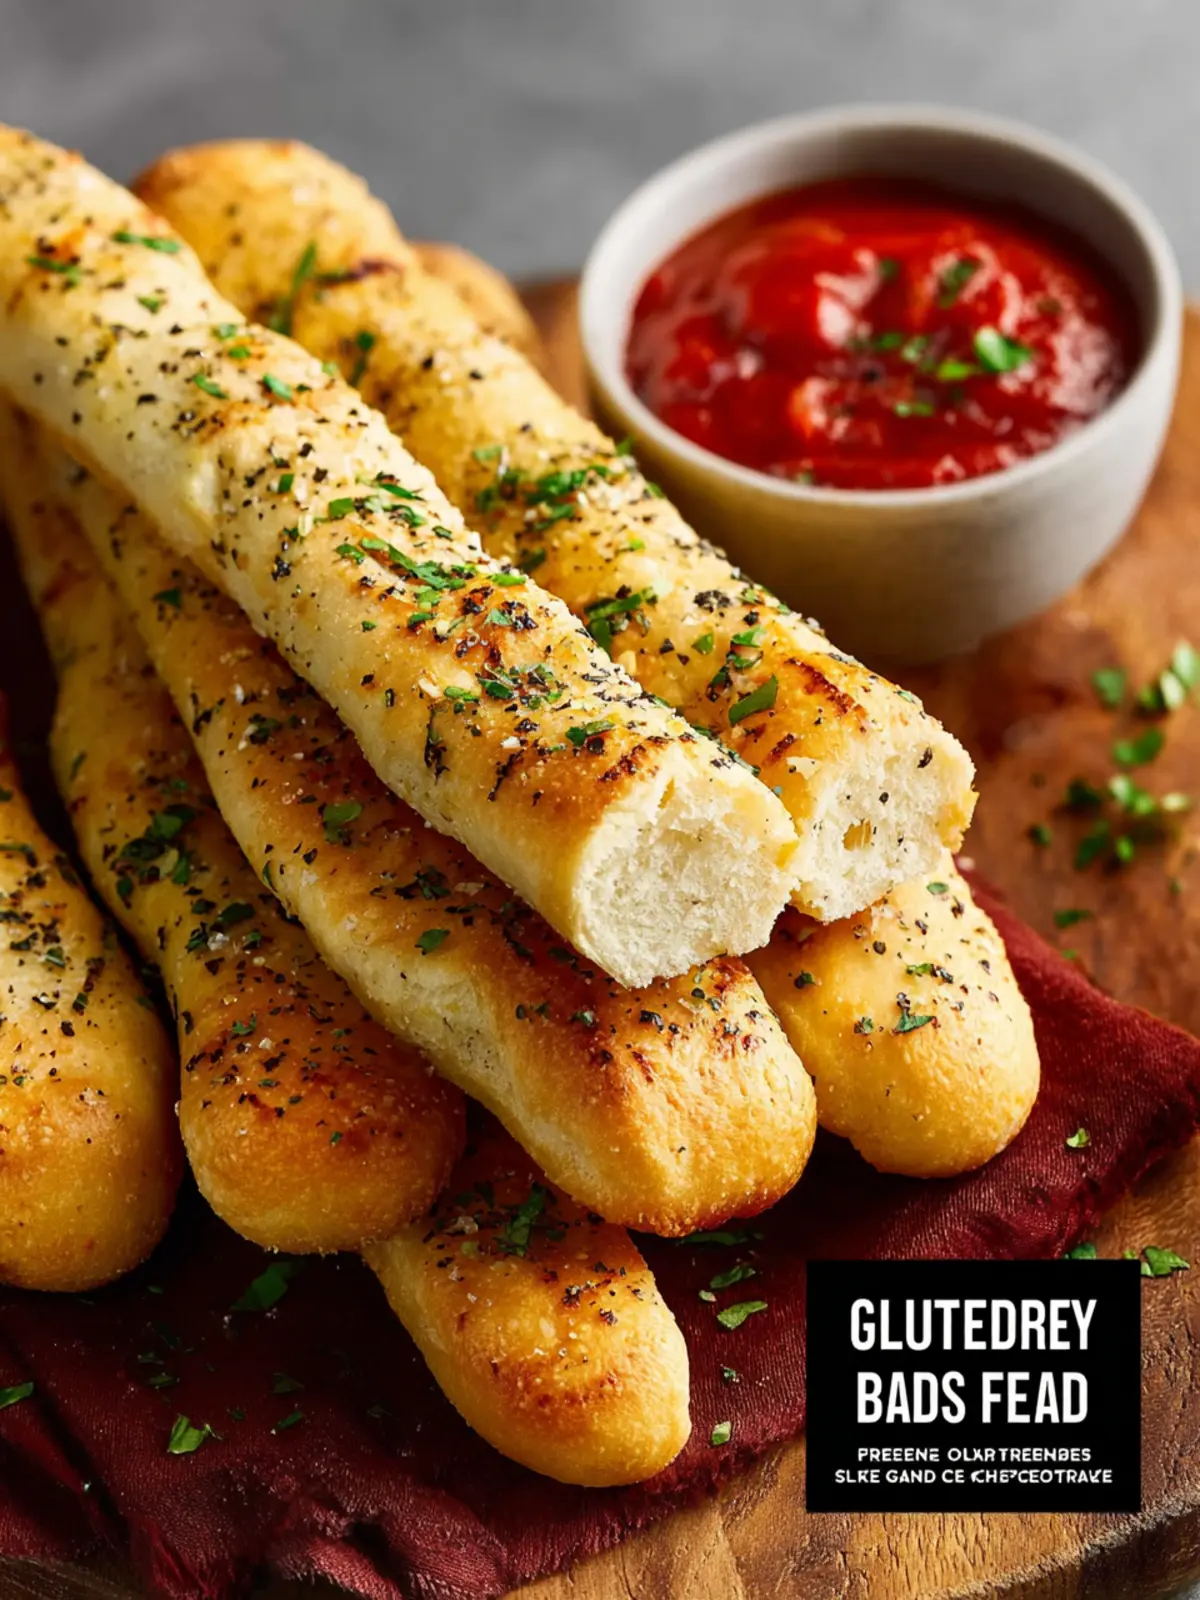
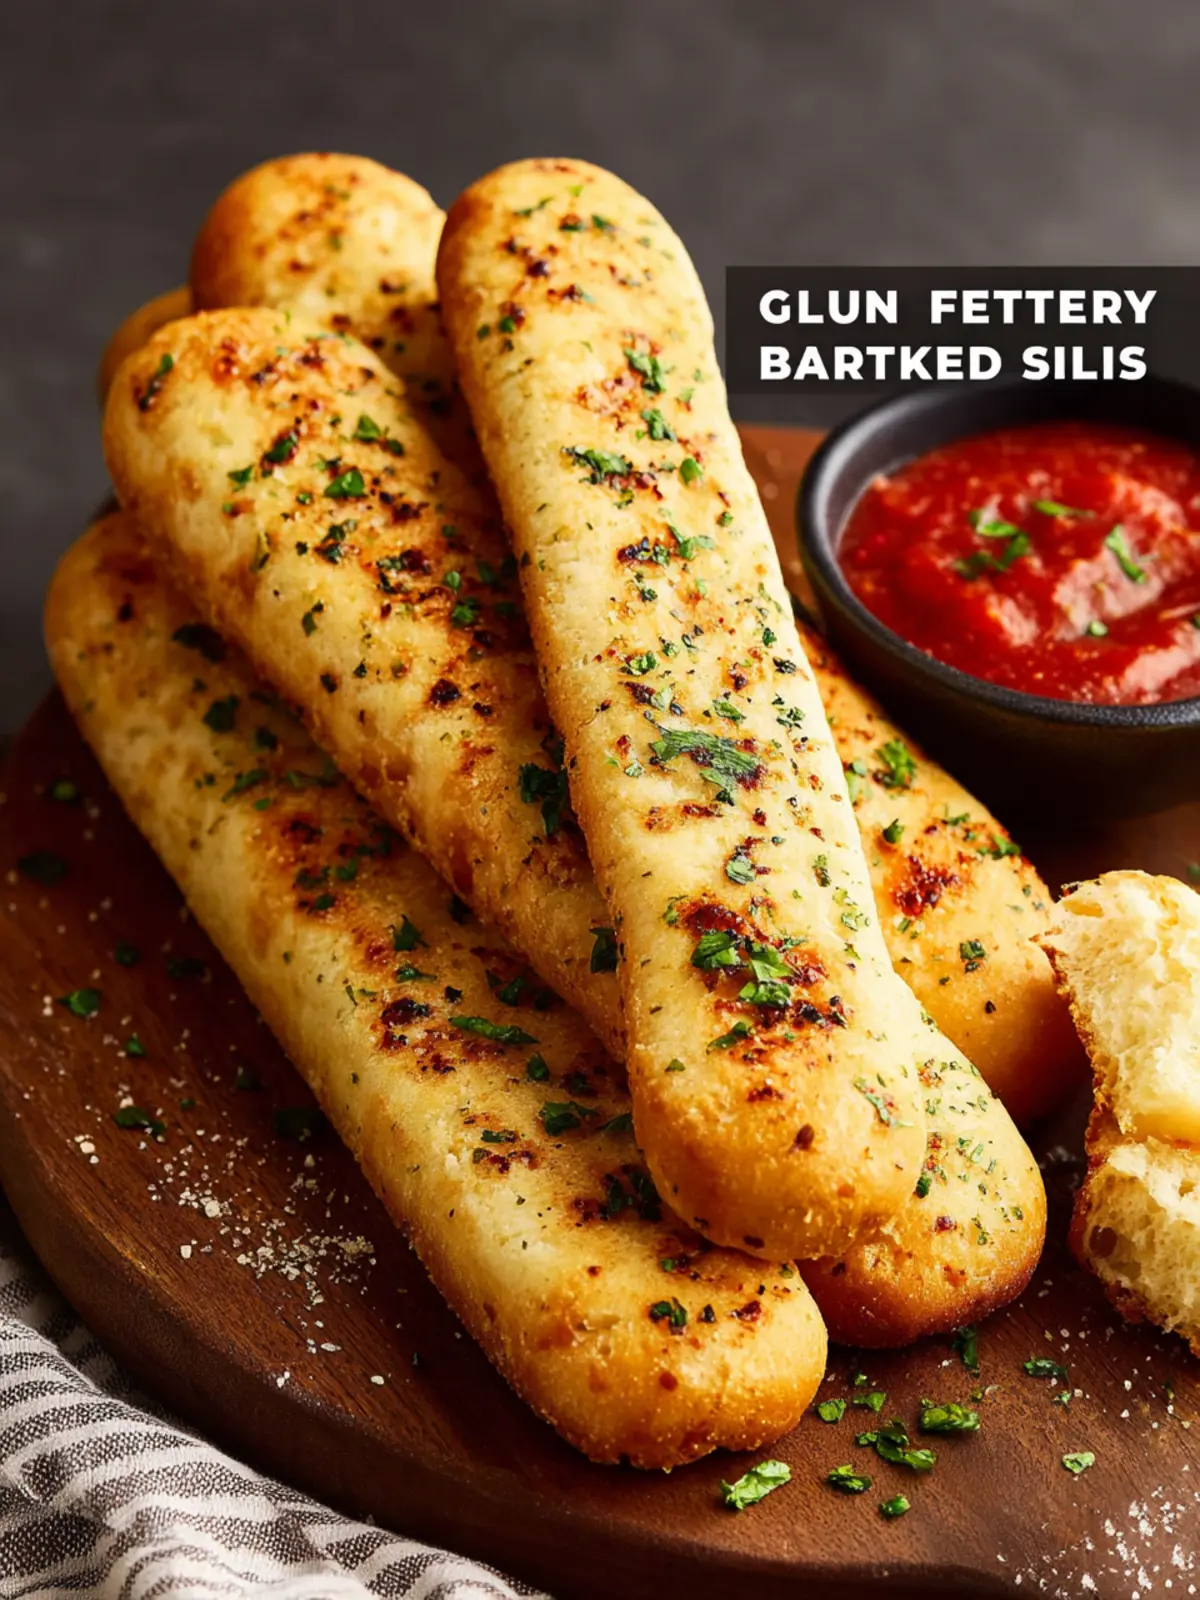
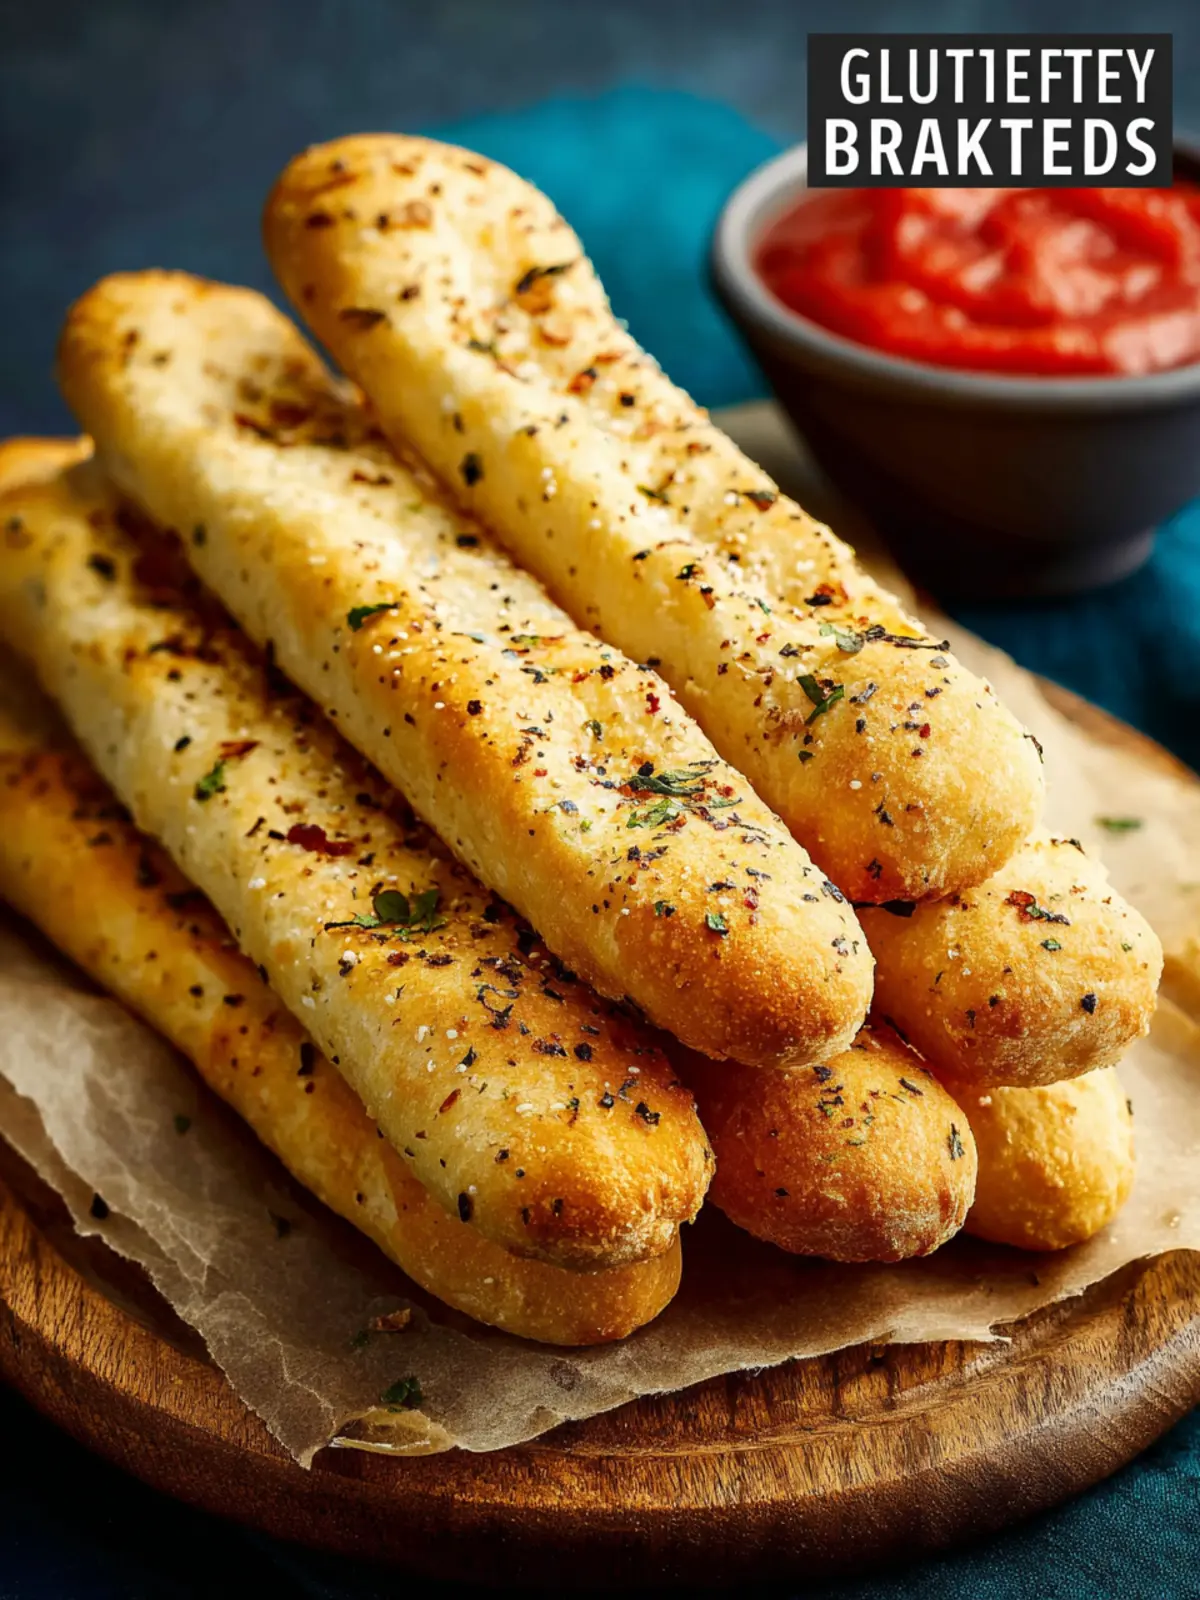
Gluten Free Breadsticks That Are Better Than Olive Garden’s
Introduction to Gluten Free Breadsticks (Olive Garden Style)
Imagine sitting down at a cozy Italian restaurant, the aroma of freshly baked breadsticks wafting through the air, making your stomach rumble with anticipation. Now, let’s bring that experience home with our irresistible gluten free breadsticks, inspired by Olive Garden’s famous recipe. These delightful breadsticks are not just for those avoiding gluten; they’re a mouthwatering treat that everyone can enjoy. Picture a golden, fluffy exterior with a soft, chewy inside, brushed generously with garlic-infused butter—pure comfort on a plate!
Creating your own gluten free breadsticks might seem daunting, but trust me, it’s easier than you think. The secret lies in using high-quality gluten free flour, which provides the needed structure and texture without sacrificing flavor. In this recipe, we’ll combine simple ingredients that, when mixed just right, deliver the taste and satisfaction you’ve been craving. You’ll get to enjoy them fresh out of the oven, still warm, with your favorite marinara or alfredo sauce for dipping. Doesn’t that sound divine?
What makes these breadsticks a must-try?
-
Flavor-packed goodness: These gluten free breadsticks don’t skimp on flavor. The combination of garlic and butter gives them a savory kick that complements any meal, whether it’s a simple weeknight dinner or a special occasion.
-
Easy to make: You don’t need to be a seasoned chef to whip these up! With straightforward ingredients and a few steps, you’ll have a batch of fantastic breadsticks ready in no time.
-
Versatile companion: These breadsticks pair beautifully with a variety of dishes. Serve them alongside pasta, salads, or even as a standalone snack. They are perfect for game night or family gatherings.
-
Health-conscious: When you make your own breadsticks, you control the ingredients. This recipe allows you to create a gluten-free option without any preservatives or artificial flavors.
So, roll up your sleeves and get ready to impress your friends and family with these delightful gluten free breadsticks! It’s time to bring that warm, welcoming feeling of an Olive Garden dinner right into your own kitchen.
Key Ingredients for Gluten Free Breadsticks
Creating gluten free breadsticks that rival the ones from your favorite Italian restaurant can feel like a challenge, but the right ingredients make all the difference. Let’s dive into the key elements that bring these breadsticks to life!
Psyllium Husk
Psyllium husk is a star player in gluten-free baking. This magical ingredient adds both texture and structure, helping to bind the dough for those chewy, yet tender breadsticks we all crave. Without it, you might end up with a crumbly disaster!
Tapioca Starch
For that irresistible chew, tapioca starch is your go-to. It not only provides a lovely bite but also contributes to the overall texture. You’ll definitely notice the difference it makes as you pull apart each stick.
Millet Flour
Nutritious and subtly flavorful, millet flour beautifully enhances the texture of your gluten free breadsticks. It’s a delightful choice that adds a touch of earthiness without overpowering the recipe.
Buckwheat Flour
Buckwheat flour brings depth to the flavor profile and packs a punch in the nutrient department. It complements the other flours while creating a more well-rounded breadstick experience.
Instant Yeast
Using instant yeast speeds up the rising process, making your breadsticks easier to prepare. It’s an essential ingredient that ensures they are fluffy and light.
Apple Cider Vinegar
Not only does apple cider vinegar enhance flavor, but it also acts as a leavening agent. This is crucial for achieving that airy texture we all love in breadsticks.
Butter
Melted butter brushed on top right before baking infuses richness and helps develop a golden, savory finish. It creates an inviting aroma that draws everyone to the table.
With these ingredients, you’ll be well on your way to savoring some incredible gluten free breadsticks that are sure to impress!
Why You’ll Love These Gluten Free Breadsticks
Creating gluten free breadsticks that mirror the beloved Olive Garden classic isn’t just about making a recipe; it’s about igniting nostalgia and bringing people together over great food. I still remember the excitement of dipping warm, buttery breadsticks into savory marinara sauce during a cozy dinner with friends. Now, with this recipe, that experience is accessible to everyone, regardless of dietary restrictions.
Divine Taste and Texture
- Flavorful Combination: Each bite is a harmonious blend of garlic, salt, and a hint of Italian herbs. You won’t miss the gluten one bit.
- Perfectly Soft: These breadsticks achieve that pillowy softness that you crave, making them ideal for enjoying with your favorite pasta or soup.
Easy to Make and Share
- Quick Prep: With straightforward ingredients, you can whip up a batch in no time. There’s nothing quite like the smell of freshly baked breadsticks wafting through your kitchen.
- Perfect for Gatherings: Whether it’s a casual dinner or a lively get-together, these gluten free breadsticks are sure to be a hit. Sliced and shared with family and friends, they encourage that communal table experience we all treasure.
Nutritious Alternatives
- Health-Conscious Delight: Made from wholesome ingredients, these breadsticks are lighter while still being indulgent. You can feel good about serving them to loved ones.
Once you taste these delightful gluten free breadsticks, I’m confident they’ll become a staple in your culinary repertoire!

Cooking Tips for Perfect Gluten Free Breadsticks
Creating gluten free breadsticks that rival those from your favorite Italian restaurant can seem like a daunting task, but a few expert tips can make all the difference. Picture the aroma of warm, buttery breadsticks filling your kitchen—it’s not just a fantasy!
Choose Your Flour Wisely
Using a high-quality gluten-free all-purpose flour blend will set the foundation for your gluten free breadsticks. Look for one that includes xanthan gum or psyllium husk, as these ingredients help create that elusive structure and chewiness.
Don’t Rush the Dough
Allow your dough to rest for about 30 minutes before shaping it into sticks. This gives the flour time to absorb moisture, leading to a better texture. Trust me; this step is not to be skipped!
Perfect Your Baking Temperature
Oven temperature can make or break your breadsticks. Preheat to 400°F and place your breadsticks in the center rack for even cooking. If you notice they are browning too quickly, you can cover them lightly with aluminum foil.
Brush with Butter—Don’t Skip It
A generous brush with melted butter before baking not only adds flavor but also contributes to that beautiful golden crust. For added garlic flavor, mix minced garlic into the butter for a delightful twist.
Enjoy Fresh Out of the Oven
Let your gluten free breadsticks cool slightly before serving. This ensures you enjoy them at their best, soft and warm, ready to be devoured with your favorite dips or alongside a hearty pasta dish.
Time Breakdown for Gluten Free Breadsticks
Creating gluten free breadsticks at home transforms a simple meal into a delightful experience. Here’s a quick time breakdown to help you manage your kitchen schedule and enjoy the process.
Preparation Time
For your gluten free breadsticks, the initial prep will take about 15 minutes. This includes gathering your ingredients, mixing your dough, and shaping the sticks.
Rising Time
Once you’ve mixed your dough, give it some love. You’ll want to let it rise for approximately 1 hour. This step is crucial for that perfect texture and flavor.
Baking Time
When your dough has risen beautifully, pop it in the oven. The baking process will take around 15-20 minutes until they’re golden brown and irresistible.
Total Time
Combining all the steps, your total time comes to about 1 hour and 35 minutes, allowing you to create delicious gluten free breadsticks that will impress your family and friends.
Nutritional Facts for Gluten Free Breadsticks
Understanding the nutritional facts for gluten free breadsticks is essential for those mindful of their diet. These delightful breadsticks not only please the palate but also keep the numbers in check.
Calories
In each serving, you can expect about 150 calories. This makes them a satisfying yet light addition to your meal, perfect for enjoying without guilt.
Protein
These gluten free breadsticks pack approximately 4 grams of protein per serving. While they may not rival a full protein dish, they still contribute to your daily intake, especially when paired with dips or spreads.
Sodium
With around 300 milligrams of sodium, these breadsticks are seasoned just right to enhance their flavor without overwhelming your dietary sodium recommendations. Enjoy them as a delicious accompaniment to your favorite dishes!
FAQs about Gluten Free Breadsticks
When craving gluten free breadsticks, it’s essential to consider a few common questions that often come up. Here’s everything you need to know to ensure your breadstick experience is a delight.
Can I use other flours?
While a gluten-free blend typically gives the best results, you can experiment with other flours! For instance, almond flour and coconut flour can be great alternatives, but they each bring unique textures and flavors. Just remember, if you switch to almond or coconut flour, you may need to adjust the ratios and add some extra binding agents like xanthan gum to mimic the elasticity that gluten provides. It’s all about finding that perfect mix that suits your taste!
How can I store leftover breadsticks?
Leftover gluten free breadsticks can be stored easily! Keep them in an airtight container at room temperature for up to two days. If you prefer a longer shelf life, consider freezing them. Wrap them tightly in plastic wrap or foil, then place them in a zip-top freezer bag. When you’re ready to enjoy, simply thaw and reheat in the oven for a few minutes until warm.
What can I serve with gluten-free breadsticks?
Gluten free breadsticks make for versatile companions! Pair them with marinara sauce for a classic dip or serve them alongside your favorite pasta dish for that extra flavor boost. They also shine when served with a hearty soup or salad. Imagine dipping these warm, fluffy sticks into a comforting bowl of minestrone or enjoying them with a crisp Caesar salad!
By addressing these FAQs, you’ll be well on your way to making the most of your gluten free breadsticks. Enjoy every bite!
Conclusion on Gluten Free Breadsticks
Creating these gluten free breadsticks at home is not just a culinary achievement; it’s a delightful experience that brings a taste of your favorite restaurant right to your kitchen. Perfectly warm, buttery, and soft, these breadsticks serve as an ideal accompaniment to any meal or simply as a snack. Whether you dive into them right out of the oven or pair them with pasta or salads, their versatility is unmatched.
Next time you crave that Olive Garden-inspired flavor, remember that making gluten free breadsticks is easier than you think. Plus, the joy of sharing them with friends or family makes them even more special. Happy baking!
Print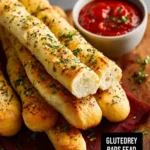
Gluten-Free Breadsticks
- Total Time: 2 hours 40 minutes
- Yield: 12 breadsticks 1x
- Diet: Gluten-Free
Description
Delicious gluten-free breadsticks made with psyllium husk and various flours.
Ingredients
Scale
- 1/4 cup whole psyllium husk
- 1 3/4 cups warm water
- 1 1/2 cups tapioca starch
- 1 1/4 cups millet flour
- 6 tbsp buckwheat flour
- 1 1/2 tbsp sugar
- 2 1/4 tsp instant yeast
- 2 tsp salt
- 1 tbsp melted butter
- 2 tsp apple cider vinegar
- 2 tbsp unsalted butter, melted
- 1/4 tsp salt
- 1/4 tsp garlic powder
Instructions
- Pan Prep: Line 2 large baking sheets with parchment paper and set aside.
- Psyllium Gel: Mix water and psyllium husk together in a medium bowl. Set aside to thicken up as you prep the other ingredients.
- Flour Mixture: Whisk tapioca starch, millet flour, buckwheat flour, sugar, yeast and salt together in a large bowl until well combined.
- Combine Wet Ingredients: Stir melted butter and vinegar into the psyllium mixture.
- Add Wet to Dry Ingredients: Pour the psyllium gel into the flour mixture. Mix together until fully combined. Make sure to scrape down the bottom and sides of the bowl every so often to get all the floury bits. Mix together until you end up with a thick, sticky dough that easily clumps together.
- Knead: Generously dust your hands and a clean work surface with extra flour. Knead the dough on the floured surface, adding a bit more flour as you knead until the dough is smooth and slightly tacky.
- Divided & Shape: Divide the dough into 12 equal portions (about 70 g or 2 ounces). Roll each dough ball out into an 8-inch log. Transfer to the parchment-lined baking sheet. Repeat with the remaining dough.
- Proof: Cover with foil, plastic wrap or a clean tea towel. Set aside in a warm place for about 2 hours to rise.
- Bake: Preheat oven to 400°F (200°C). Once heated, remove the cover from the breadsticks and bake for 18-20 minutes. Halfway through the cook time, rotate the pans to ensure even cooking.
- Topping: While the breadsticks bake, mix melted butter, salt and garlic powder together.
- Finish: Brush the breadsticks with garlic butter while still hot. Sprinkle additional toppings if desired (like parmesan cheese or fresh parsley). Allow a few minutes to cool then serve and enjoy.
Notes
- These breadsticks are a great gluten-free option for those who cannot have traditional bread.
- Can be served with various dips or soups.
- Store leftovers in an airtight container.
- Prep Time: 20 minutes
- Cook Time: 20 minutes
- Category: Appetizer
- Method: Baking
- Cuisine: American
Nutrition
- Serving Size: 1 breadstick
- Calories: 120
- Sugar: 1g
- Sodium: 200mg
- Fat: 5g
- Saturated Fat: 3g
- Unsaturated Fat: 2g
- Trans Fat: 0g
- Carbohydrates: 15g
- Fiber: 2g
- Protein: 2g
- Cholesterol: 10mg