Follow Me On Social Media!


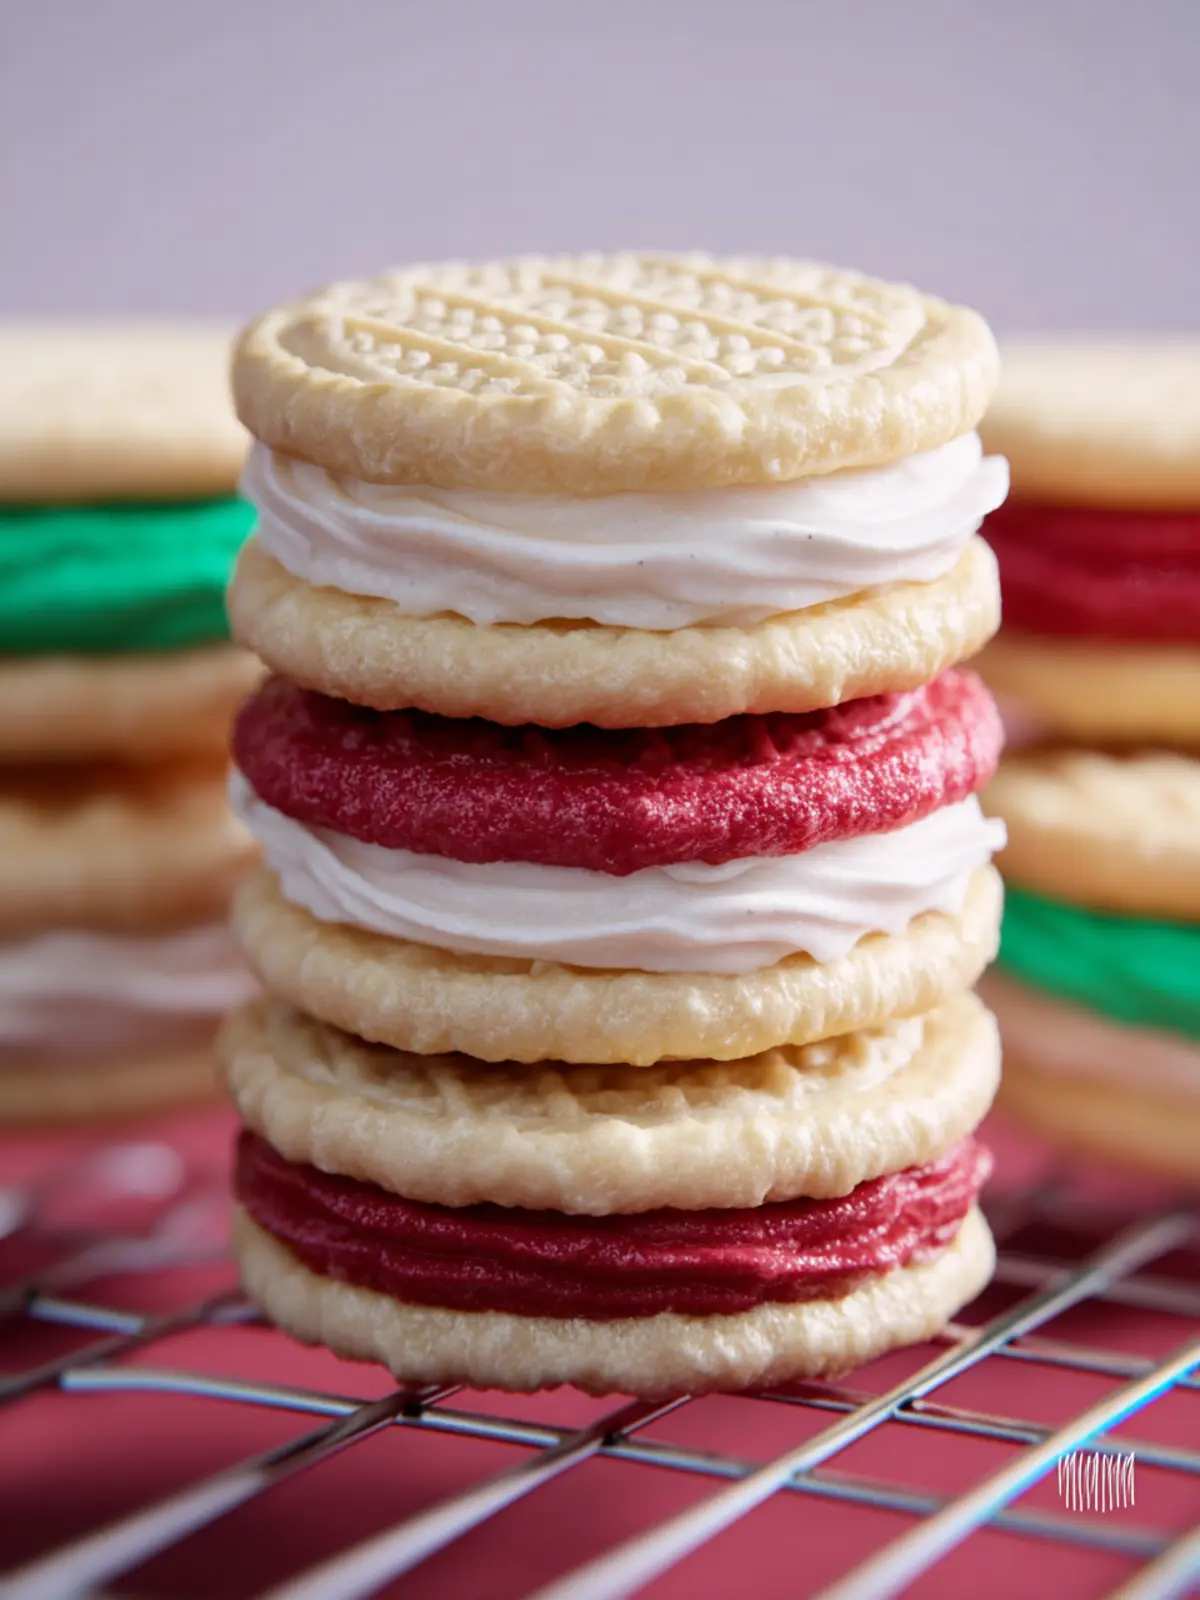
Cream Wafer Sandwich Cookie Recipe: Irresistibly Sweet Delight
Introduction to Cream Wafer Sandwich Cookies
Cream wafer sandwich cookies evoke that unmistakable feeling of comfort and nostalgia, don’t they? I can still remember the first time I encountered these delightful treats during a family gathering. My grandmother would bake up a storm, crafting stacks of these light, crispy cookies filled with luscious cream. It was a time for warm conversations and laughter, punctuated by the irresistible crunch of those sandwich cookies. Every bite was a moment of pure joy—a reminder that the simplest desserts often hold the best memories.
As we delve into this cream wafer sandwich cookie recipe, it’s important to appreciate not just the flavors, but also the experiences that accompany them. These cookies are not just sweet snacks; they represent connection, love, and tradition shared around the dinner table. The good news is, you don’t need to be a seasoned baker to recreate these delectable bites.
Crafting Your Own Memories
With just a few simple ingredients, you can whip up a batch that might just become a new family favorite. Imagine filling your kitchen with the essence of warm vanilla and sugar as you prepare your own version of these cherished cookies. Each step in this recipe is designed to be as rewarding as the end result. Whether you’re making them for a celebration or just a cozy evening at home, these cookies possess a magical ability to bring people together.
So why not invite your friends over for a baking session? You can share stories while filling these lovely wafers with delicious cream—a task that’s equal parts fun and satisfying. Not only will you get to enjoy the delicious results, but you’ll also create fresh memories to cherish for years to come.
As we move into the ingredients, remember that this cream wafer sandwich cookie recipe is about more than just the cookies—it’s a way to celebrate life, one delicious bite at a time.
Key Ingredients for Cream Wafer Sandwich Cookies
Cream wafer sandwich cookie recipe brings a delightful treat to your dessert table with its delicate layers and creamy filling. The key to achieving that perfect texture and flavor relies on a few essential ingredients.
Unsalted Butter: I use softened unsalted butter to create a rich and creamy base for both the cookie and the filling. It’s essential for achieving that light and fluffy texture we love.
Heavy Cream: Adding heavy cream helps to give our cookies that perfect melt-in-your-mouth quality. Plus, a splash of cream in the filling keeps it luscious and satisfying.
All-Purpose Flour: This is the backbone of the cookie dough. I prefer all-purpose flour for its versatility and ability to create a tender crumb that holds its shape during baking, ensuring our cookies stay deliciously intact.
Granulated Sugar: Not only do we use it for dusting, but sugar also helps create a delightful crust on the cookies, enhancing their sweetness and giving them a lovely golden hue.
Confectioners’ Sugar: This sugar brings a smooth and creamy texture to our filling. Its fine consistency blends perfectly, allowing for that velvety richness that makes each bite irresistible.
These ingredients combine harmoniously to create a cream wafer sandwich cookie experience that’s truly unforgettable.
Why You’ll Love This Recipe
Perfect for any occasion
There’s something irresistibly charming about a cream wafer sandwich cookie recipe. These delightful treats are not just cookies; they are a conversation starter and a little piece of nostalgia that can brighten any gathering. Picture this: you walk into a cozy café or a friend’s kitchen, and the scent of freshly baked cookies wafts through the air, instantly making you feel at home.
Cream wafer sandwich cookies are versatile too. Whether you’re hosting a casual get-together, celebrating a birthday, or simply indulging your sweet tooth after a long day, these cookies are sure to impress. Their light, crispy texture paired with a luscious cream filling makes them an absolute crowd-pleaser. Plus, they’re easy to customize. Add a hint of vanilla for that classic taste, or swirl in some peppermint oil during the mixing process for a festive twist.
Making them can even double as a creative outlet! Get your friends involved; the fun lies in shaping and filling these little delights together. And let’s be honest, there’s nothing quite like enjoying a batch of homemade cookies, especially when you know they were prepared with love and laughter. So, gather the ingredients and dive into the joy of baking your very own cream waivers—you won’t regret it!

Tips for Making Perfect Cream Wafer Sandwich Cookies
Crafting the ideal cream wafer sandwich cookies is a delightful journey that combines precision and creativity. Achieving that perfect balance of crispiness and creaminess involves a few key techniques that can elevate your baking game. Let’s explore some essential tips.
Essential Baking Tips
-
Chill Your Dough: After mixing your dough, let it chill in the refrigerator for at least 30 minutes. This helps the dough firm up, making it easier to roll out and shape without sticking.
-
Roll Thin: For the best texture, aim for a dough thickness of about 1/8 inch. This ensures that the cookies bake evenly and achieve that perfect crispiness.
-
Precision with Cutting: Use a sharp cookie cutter for clean edges. If using patterned cutters, ensure they are deep enough to create defined shapes without tearing.
-
Watch the Bake Time: These cookies can go from perfectly golden to overdone quickly. Check for a light golden edge around 8-10 minutes, and remember to let them cool completely before adding the filling.
-
Flavor Your Cream: Enhance your filling by adding vanilla extract, cocoa powder, or even a hint of orange zest. This subtle twist can take your cookies to new flavor heights.
With these tips in hand, you’ll be well on your way to mastering the art of the cream wafer sandwich cookie recipe! Enjoy the process, and don’t hesitate to experiment with flavors and styles.
Time Breakdown for Cream Wafer Sandwich Cookies
Making your very own cream wafer sandwich cookies is not just a delightful experience but also a well-structured one. Here’s a handy time breakdown to help you plan your baking adventure.
Preparation time
Gathering your ingredients and preparing the dough will take approximately 30 minutes. It’s essential to measure everything out and have your workspace tidy for a smoother experience.
Chilling time
Letting the dough chill in the refrigerator enhances the texture and flavor, requiring about 1 hour. This step ensures your cookies hold their shape when baked.
Baking time
Once baked, your cookies will only need about 12-15 minutes in the oven. The golden brown color will be your cue that they’re ready!
Total time
In total, expect to spend around 1 hour and 45 minutes from start to finish. Baking these delicious cream wafer sandwich cookies is a great way to spend your afternoon, with a sweet reward at the end!

Nutritional Information for Cream Wafer Sandwich Cookies
Understanding the nutritional information for your delicious cream wafer sandwich cookie recipe is key for enjoying them guilt-free. Each cookie packs a delightful punch of flavor while still keeping an eye on what you consume.
Calories:
On average, each cookie contains about 90 calories. It’s an ideal treat when you need a quick energy boost, without overindulging.
Carbohydrates:
These cookies offer roughly 12 grams of carbohydrates per cookie, primarily from the sugars and flour. They satisfy your sweet cravings while providing your body with essential energy to keep you going.
Fats:
With about 4 grams of fat per cookie, they strike a lovely balance between taste and nutrition. The fats mainly come from butter, adding richness to each bite without overwhelming your diet.
Enjoy your baking!
FAQs about Cream Wafer Sandwich Cookies
Creating delightful cream wafer sandwich cookies not only brings joy to your home, but also invites a world of questions as you embark on this delicious adventure. Let’s tackle some common queries to make your baking experience as smooth as the filling in your cookies!
Can I make these cookies gluten-free?
Absolutely! You can adapt the cream wafer sandwich cookie recipe to be gluten-free by substituting regular flour with a high-quality gluten-free all-purpose flour blend. Many brands offer blends that mimic the texture and taste of traditional flour. Just keep in mind that some gluten-free flours may absorb more moisture, so you might need to adjust the liquid content to achieve the right dough consistency.
How do I store cream wafer sandwich cookies?
Storing your cookies properly ensures they stay fresh and tasty. Place your cream wafer sandwich cookies in an airtight container at room temperature for up to a week. If you want to keep them longer, consider refrigerating them, but make sure to allow them to come to room temperature before serving to maintain their delightful texture.
Can I add different flavors or extracts to the filling?
Definitely! Don’t hesitate to get creative with the fillings. A splash of vanilla, almond extract, or even a hint of mint can take your cream wafer sandwich cookies to the next level. Feel free to experiment with flavored powdered sugar or even cocoa powder for a chocolatey twist!
Tips for coloring the filling?
If you’re looking to add some visual flair, food coloring can work wonders! Start with a small amount and mix thoroughly until you achieve your desired shade. Gel food coloring is particularly effective as it offers vibrant colors without altering the consistency of your filling. Whether you’re aiming for soft pastels or bold hues, have fun with it!
With these tips in hand, you’re all set to create amazing cream wafer sandwich cookies that friends and family will rave about! Happy baking!
Conclusion on Cream Wafer Sandwich Cookies
The journey of crafting these delightful cream wafer sandwich cookies is both rewarding and delicious. With a few simple ingredients like flour, butter, and sugar, combined with the delightful cream filling, each bite transports you into a world of sweetness and nostalgia. These cookies are perfect for sharing or enjoying during a cozy night in. As you explore different variations—maybe adding a hint of vanilla or a sprinkle of sea salt—your creativity can shine. So, gather your loved ones, whip up a batch, and let the joy of baking fill your home with warmth and happiness. Enjoy!
Print
Butter Cookies with Cream Filling
- Total Time: 2 hours 29 minutes
- Yield: 24 cookies 1x
- Diet: Vegetarian
Description
Delicious butter cookies filled with a creamy frosting.
Ingredients
Scale
- 1 cup unsalted butter (softened)
- 1/3 cup heavy cream
- 2 cups flour
- 1/2 cup granulated sugar (for dusting)
- 1/2 cup unsalted butter (softened)
- 1/4 teaspoon kosher salt
- 1 1/2 cups confectioner’s sugar
- 2 teaspoons vanilla
- 2–4 tablespoons heavy cream
- Food coloring (optional)
Instructions
- In the bowl of a stand mixer (or with a hand mixer), beat the butter 3-5 minutes until it’s light and fluffy. With the mixer on low, slowly add the flour and then the cream. Mix until just combined. Cover and refrigerate the dough for at least two hours or overnight.
- Preheat oven to 375 degrees F.
- On a lightly floured surface, roll out the dough to a 1/8-inch thickness. Cut with a round cookie cutter.
- Add the sugar to a separate small bowl. Press one of the cut out circles into the sugar. Then, place on an ungreased cookie sheet. Prick with a toothpick or fork. Repeat with remaining circles.
- Bake 7-9 minutes, removing the cookies from the oven just before they start to brown. Remove them from the cookie sheet to cool.
- In the meantime, make the filling. In the bowl of a stand mixer (or with a hand mixer), cream the butter and salt until light and fluffy (This will take 3-5 minutes.) With the mixer on low, add the powdered sugar, 2 tablespoons of heavy cream, and vanilla. Then add the food coloring. If the filling seems too thick, add more heavy cream until desired consistency is achieved.
- To easily frost the cookies, put the filling in a piping bag. Once the cookies are cool, pipe the filling on the back of one cookie. Top with another cookie and press to secure.
- Pack and store in an airtight container.
Notes
- For added flavor, consider using flavored extracts in the filling.
- These cookies can be decorated with sprinkles after frosting.
- Prep Time: 20 minutes
- Cook Time: 9 minutes
- Category: Dessert
- Method: Baking
- Cuisine: American
Nutrition
- Serving Size: 2 cookies
- Calories: 150
- Sugar: 10g
- Sodium: 50mg
- Fat: 8g
- Saturated Fat: 5g
- Unsaturated Fat: 2g
- Trans Fat: 0g
- Carbohydrates: 20g
- Fiber: 0g
- Protein: 1g
- Cholesterol: 30mg